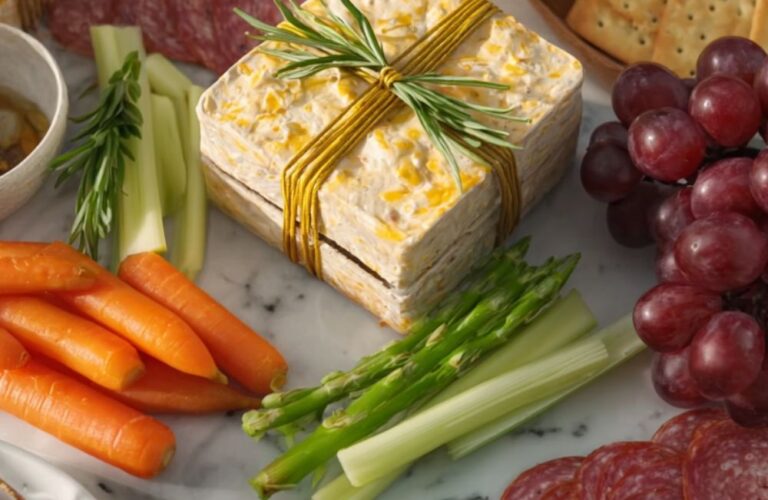
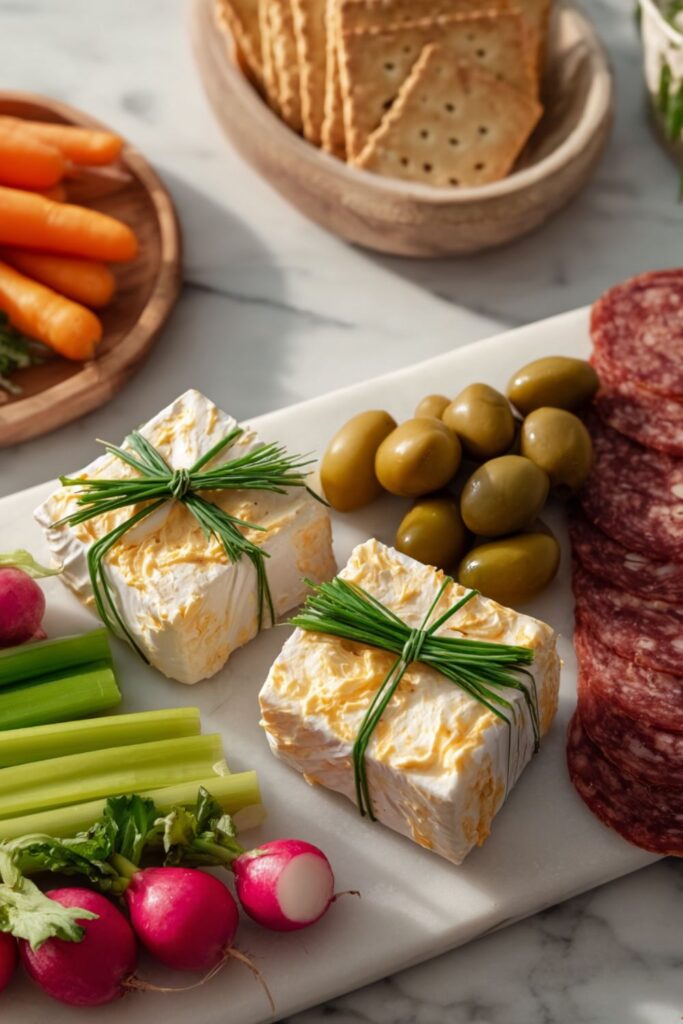
This Cheese-Filled Edible Gift Boxes Recipe is a creative and savory recipe, which features pepper jack cheese spread and grated Parmesan. It’s a show-stopping holiday centerpiece, ready in about 3 hours .
Jump to RecipeCheese-Filled Edible Gift Boxes Recipe Ingredients
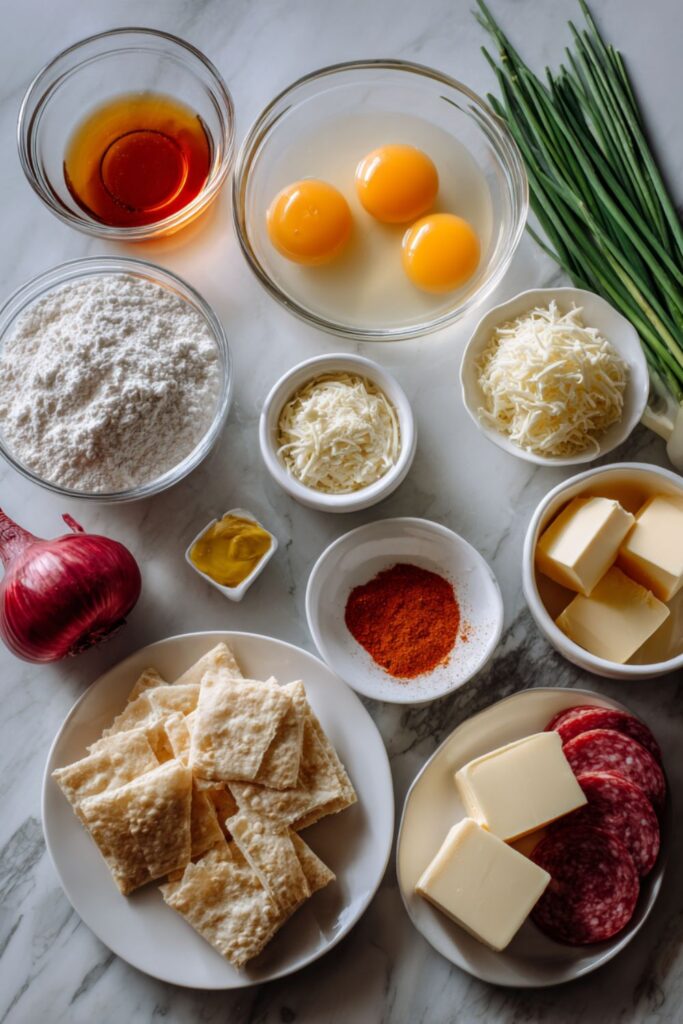
Pepper Jack Cheese Cracker:
- 2 tablespoons apple cider vinegar
- 2 large eggs, separated
- 2 1/2 cups all-purpose flour, plus more for dusting
- 1 1/2 teaspoons kosher salt, plus more for sprinkling
- 1 teaspoon dry mustard
- 1 teaspoon paprika
- 1/2 teaspoon turmeric
- One 8-ounce package pepper jack cheese spread
- 12 tablespoons (1 1/2 sticks) unsalted butter, cut into small pieces
- 1/2 cup grated Parmesan
Assembling and Decorating:
- 6 long fresh chives
- Two 8-ounce packages pepper jack cheese spread
- Assorted meats, vegetables and crackers, for serving (Suggestions: sliced prosciutto, salami, carrots, radish, celery and butter crackers)
How To Make Cheese-Filled Edible Gift Boxes Recipe
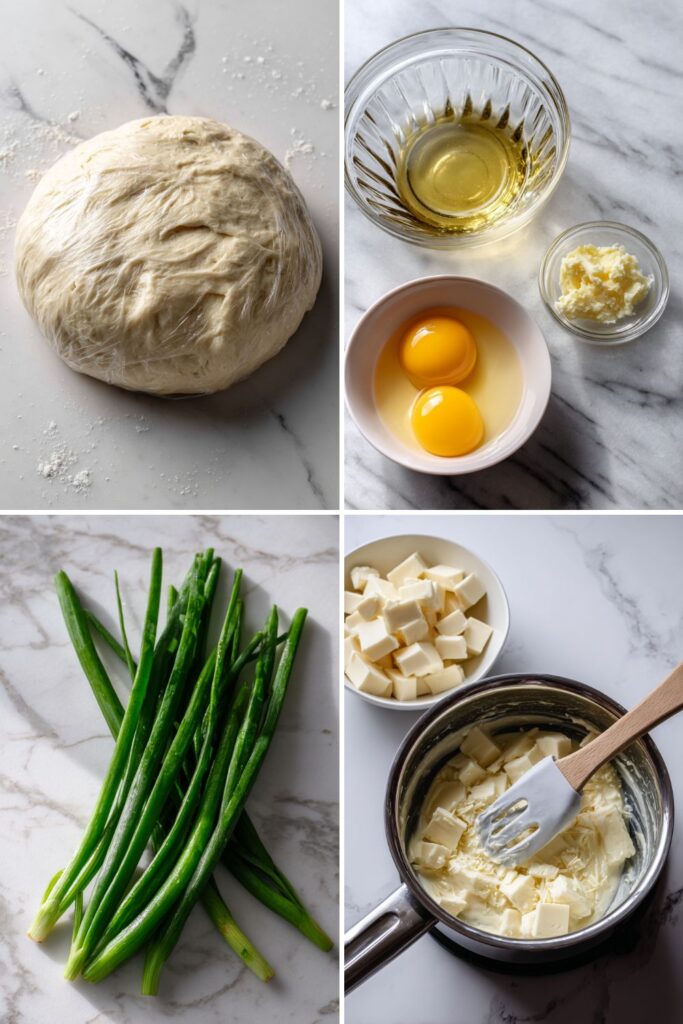
- Prepare the liquid binder: In a small bowl, whisk together the apple cider vinegar, egg whites, and 3 tablespoons of water. Set this aside. Place the egg yolks in a separate small bowl, cover, and refrigerate until ready to use for the egg wash later.
- Process the dough: In a food processor, pulse the flour, salt, dry mustard, paprika, and turmeric to combine. Add the 8-ounce package of pepper jack cheese spread, the cold butter pieces, and the grated Parmesan. Pulse until the butter is completely broken up and the mixture looks sandy.
- Form the dough ball: Add the egg white mixture to the processor and pulse until the dough comes together in a ball. (It’s okay if it’s a little wet). Turn the dough out onto a large piece of plastic wrap, pat it into a 1/2-inch-thick square, wrap it tightly, and refrigerate to chill and firm up for about 1 hour.
- Roll and chill: Cut the chilled dough in half. Dust a sheet of parchment paper with flour, place one piece of dough on top, and dust with more flour. Top with another sheet of parchment. Roll the dough out into a square about 1/8 inch thick. Transfer to a baking sheet and chill until very firm, about 30 minutes. Repeat with the second half of the dough.
- Cut the panels: Preheat oven to 350°F (175°C) and line 2 baking sheets with parchment. From one piece of rolled dough, measure and cut 6 panels for a box:
- Two 4-inch squares (top and bottom)
- Two 4-by-2-inch rectangles (long sides)
- Two 3 1/2-by-2-inch rectangles (shorter sides) Arrange these on a prepared baking sheet, cover, and refrigerate for 15 minutes to firm up again. Repeat with the remaining dough to make a second box.
- Bake the crackers: Prick the dough panels all over with a fork (docking) to prevent rising. Whisk 2 teaspoons of water into the reserved egg yolks and brush onto the dough panels. Bake for 25 minutes, rotating pans halfway through, until cooked through and golden brown. Let cool completely on the baking sheets on a cooling rack (about 30 minutes).
- Prepare assembly items: While crackers cool, blanch the chives in boiling water for 30 seconds until bright green and pliable, then shock in ice water. Dry thoroughly. Beat the remaining two packages of pepper jack cheese spread in a mixer until light and smooth. Transfer to a pastry bag with a medium plain tip.
- Construct the boxes: Put a 4-inch square panel flat-side up on a work surface. Pipe a line of cheese “glue” around the perimeter. Push the long edge of a 4-by-2-inch side panel into the glue. Use a soup can to help prop it up. Push the other long side panel directly opposite. Repeat with the shorter side panels. Pipe more cheese glue up the 4 vertical corners to seal the sides.
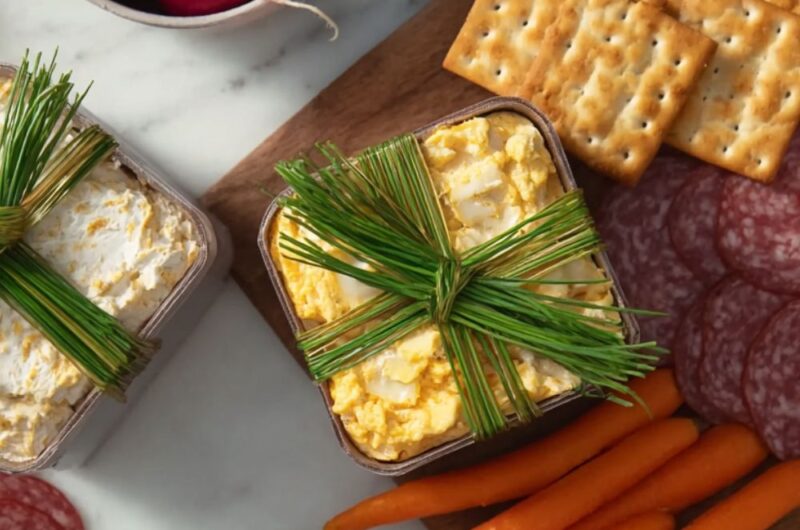
- Decorate and fill: Tie a chive bow around the remaining 4-inch square panels to look like gift lids. Pipe the remaining cheese spread into the assembled boxes to fill them. Place the decorated lids on top.
Recipe Tips
- Chilling is Mandatory: Do not skip the multiple chilling steps. The dough contains a lot of fat (cheese and butter). If it gets warm, it will lose its shape and spread in the oven rather than baking into crisp, straight panels.
- Structural Integrity: When assembling, use canned goods (like beans or soup) to support the walls of the box while the cheese “glue” sets. It acts like mortar for a gingerbread house.
- The “Glue”: Whipping the cheese spread makes it lighter and easier to pipe, but it also makes it sticky enough to hold the heavy cracker walls.
- Use the Scraps: You will have leftover dough after cutting the panels. Cut these into fun shapes or bite-sized squares and bake them alongside the panels for extra snacking crackers.
- Blanching Chives: Raw chives will snap if you try to tie them. The quick boil wilts them just enough to act like ribbon.
What To Serve With Cheese-Filled Edible Gift Boxes Recipe
These boxes are the centerpiece of a savory charcuterie spread.
- Cured Meats: Salami roses, prosciutto, or pepperoni.
- Pickled Items: Cornichons, olives, or pickled onions.
- Fresh Vegetables: Radishes, celery sticks, and carrot rounds.
- Extra Crackers: Serve the baked scrap crackers on the side for dipping.
How To Store Cheese-Filled Edible Gift Boxes Recipe
- Refrigerate: Because the filling is soft cheese, these must be stored in the refrigerator if not eaten within 2 hours. They will hold up for 1-2 days, but the crackers may slowly soften from the moisture in the cheese.
- Make Ahead: You can bake the cracker panels a day in advance and store them in an airtight container at room temperature. Assemble the boxes on the day of serving.
- Freeze: Do not freeze. The cheese spread texture will deteriorate and the crackers will become soggy.
Cheese-Filled Edible Gift Boxes Recipe Nutrition Facts
- Calories: 450
- Total Fat: 32g
- Saturated Fat: 18g
- Cholesterol: 95mg
- Sodium: 680mg
- Total Carbohydrates: 28g
- Dietary Fiber: 1g
- Sugar: 1g
- Protein: 14g
Nutrition information is estimated per serving (assuming 1 box serves 4-6 people as an appetizer).
FAQs
Yes. You can use a pub cheese, cheddar spread, or even a stiff cream cheese mixture, provided it is thick enough to hold the walls together.
Dough shrinks if the gluten hasn’t relaxed or if it wasn’t chilled enough. The resting periods in the fridge allow the gluten to relax, ensuring the rectangles stay rectangular.
No. You can use a strip of roasted red pepper, a scallion green, or even just pipe a decorative cheese “ribbon” on top if you prefer.
Cheese-Filled Edible Gift Boxes Recipe
Course: AppetizersCuisine: AmericanDifficulty: Easy2
servings1
hour25
minutes450
kcalA spectacular savory “gingerbread house” style appetizer made of spicy pepper jack crackers filled with whipped cheese spread.
Ingredients
2.5 cups flour
1.5 tsp salt
1 tsp dry mustard & paprika
8 oz pepper jack spread (for dough)
1.5 sticks butter
1/2 cup Parmesan
2 eggs (separated)
2 tbsp apple cider vinegar
16 oz pepper jack spread (for filling)
Fresh chives
Directions
- Whisk vinegar, egg whites, and water.
- Add liquid mix; pulse to a ball. Wrap and chill 1 hour.
- Pulse flour, spices, cheese spread, butter, and parmesan in food processor.
- Roll dough between parchment to 1/8″ thick; chill 30 mins.
- Cut panels (4″ squares, 4×2″ and 3.5×2″ rectangles). Chill 15 mins.
- Dock panels, brush with egg yolk, bake at 350°F for 25 mins. Cool.
- Whip cheese spread for filling; blanch chives.
- Pipe cheese on base panel edges; attach side panels.
- Fill with cheese; tie chive bow on lid and place on top.
Notes
- Scooping flour into the cup prevents packing, which leads to dry dough.
- Save scraps for dipping crackers.
- Use canned goods to prop up the walls while the cheese “glue” sets.